Hello Dagster#
Welcome to Dagster! In this guide, you'll build a simple data pipeline in Dagster that downloads the top 10 HackerNews stories. In three quick steps, you'll have functional code and begin exploring Dagster's user interface.
Note: Before you dive in, make sure you have Python 3.7+ installed.
Let's get started!
Step 1: Create hello-dagster.py#
Create a file named hello-dagster.py that contains the following code:
import pandas as pd
import requests

from dagster import MetadataValue, Output, asset, repository


@asset
def hackernews_top_story_ids():
    """
    Get top stories from the HackerNews top stories endpoint.
    API Docs: https://github.com/HackerNews/API#new-top-and-best-stories
    """
    top_story_ids = requests.get(
        "https://hacker-news.firebaseio.com/v0/topstories.json"
    ).json()
    return top_story_ids[:10]


# asset dependencies can be inferred from parameter names
@asset
def hackernews_top_stories(hackernews_top_story_ids):
    """Get items based on story ids from the HackerNews items endpoint"""
    results = []
    for item_id in hackernews_top_story_ids:
        item = requests.get(
            f"https://hacker-news.firebaseio.com/v0/item/{item_id}.json"
        ).json()
        results.append(item)

    df = pd.DataFrame(results)

    # recorded metadata can be customized
    metadata = {
        "num_records": len(df),
        "preview": MetadataValue.md(df[["title", "by", "url"]].to_markdown()),
    }

    return Output(value=df, metadata=metadata)


@repository
def hello_dagster():
    return [hackernews_top_story_ids, hackernews_top_stories]
Step 2: Install Python packages#
Next, install the Python packages you'll need to run your code in your favorite Python environment:
# run in a terminal in your favorite python environment
pip install dagster dagit pandas
Unsure? Check out the installation guide.
Step 3: Start Dagit and materialize assets#
In the same directory as
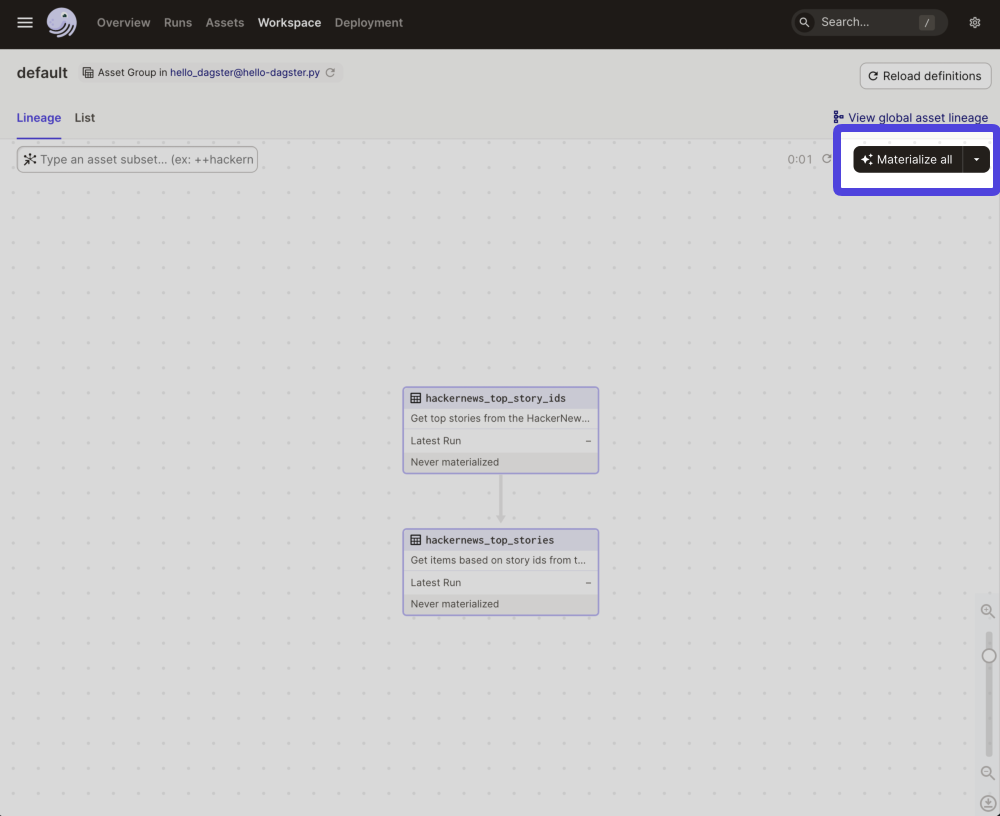
hello-dagster.py, rundagit. This command starts Dagster's user interface:# run in a terminal in your favorite python environment dagit -f hello-dagster.pyIn your browser, navigate to http://localhost:3000/.
Click Materialize All to run the pipeline and create your assets. Materializing an asset runs the asset function and saves the result. This pipeline uses the Dagster defaults to save the result to a pickle file on disk.

That's it! You now have two materialized Dagster assets:

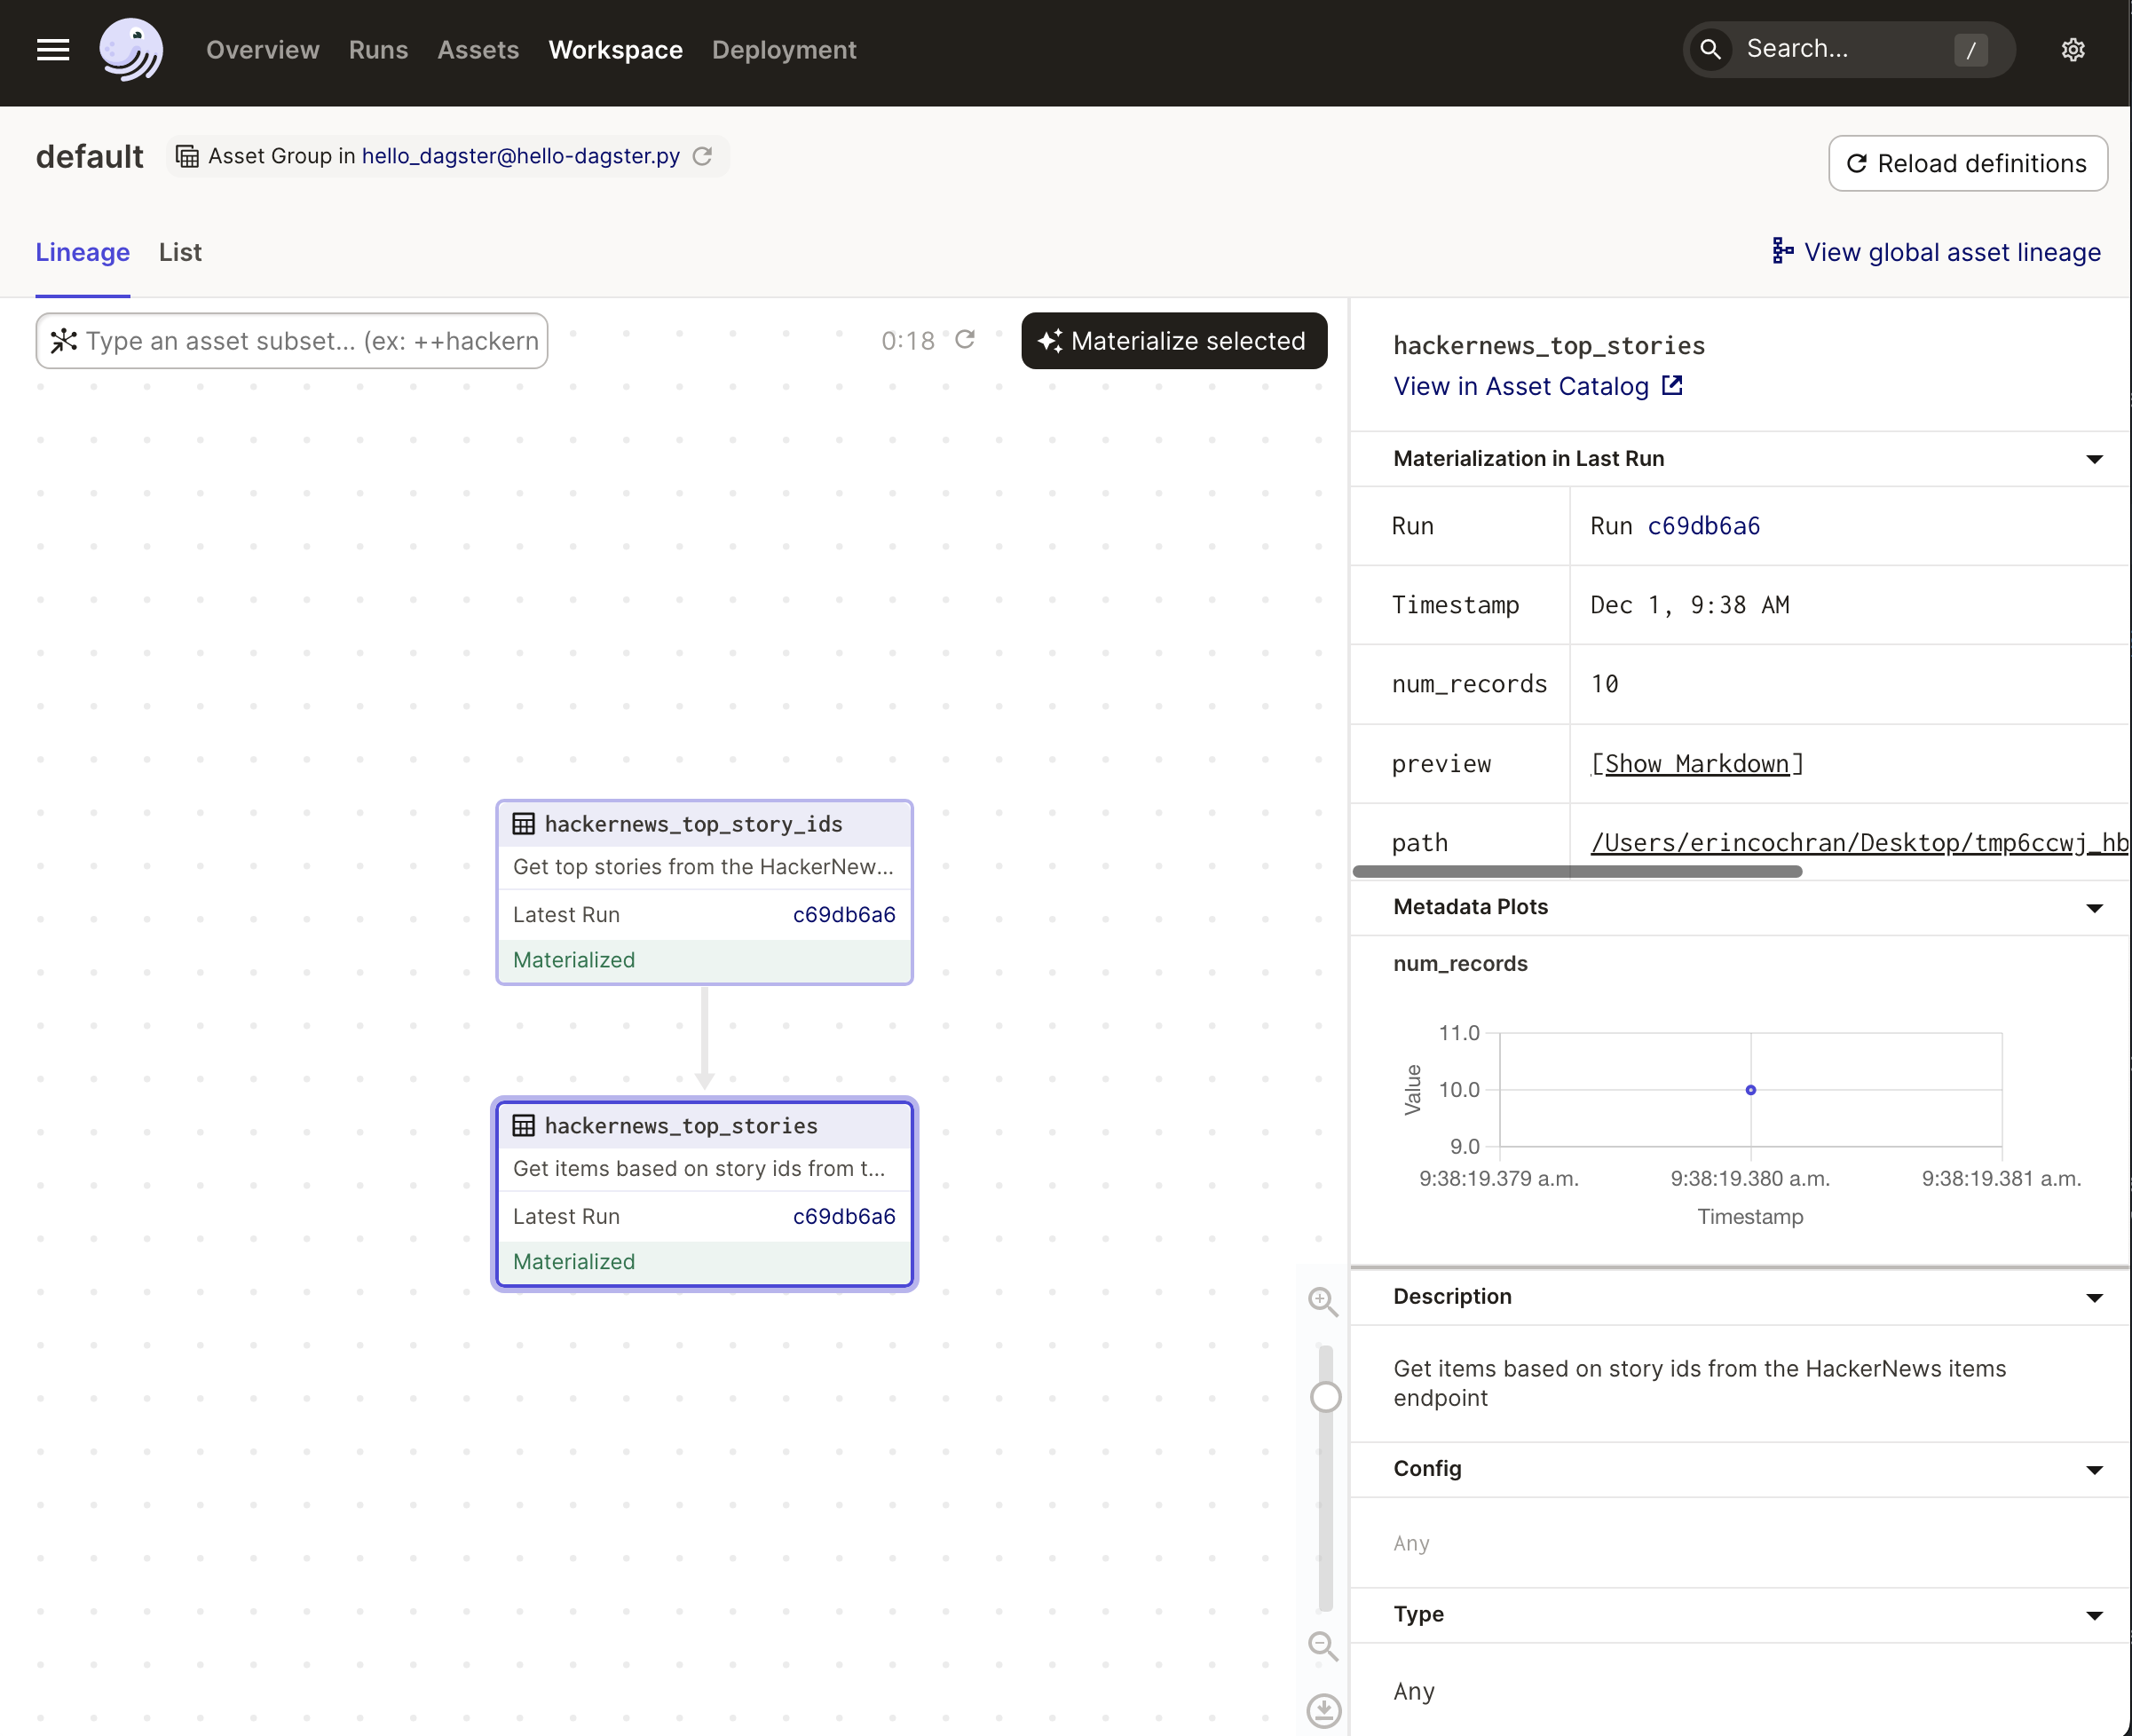
But wait - there's more. Because the hackernews_top_stories asset specified metadata, you can view the metadata right in Dagit:
Click the asset.
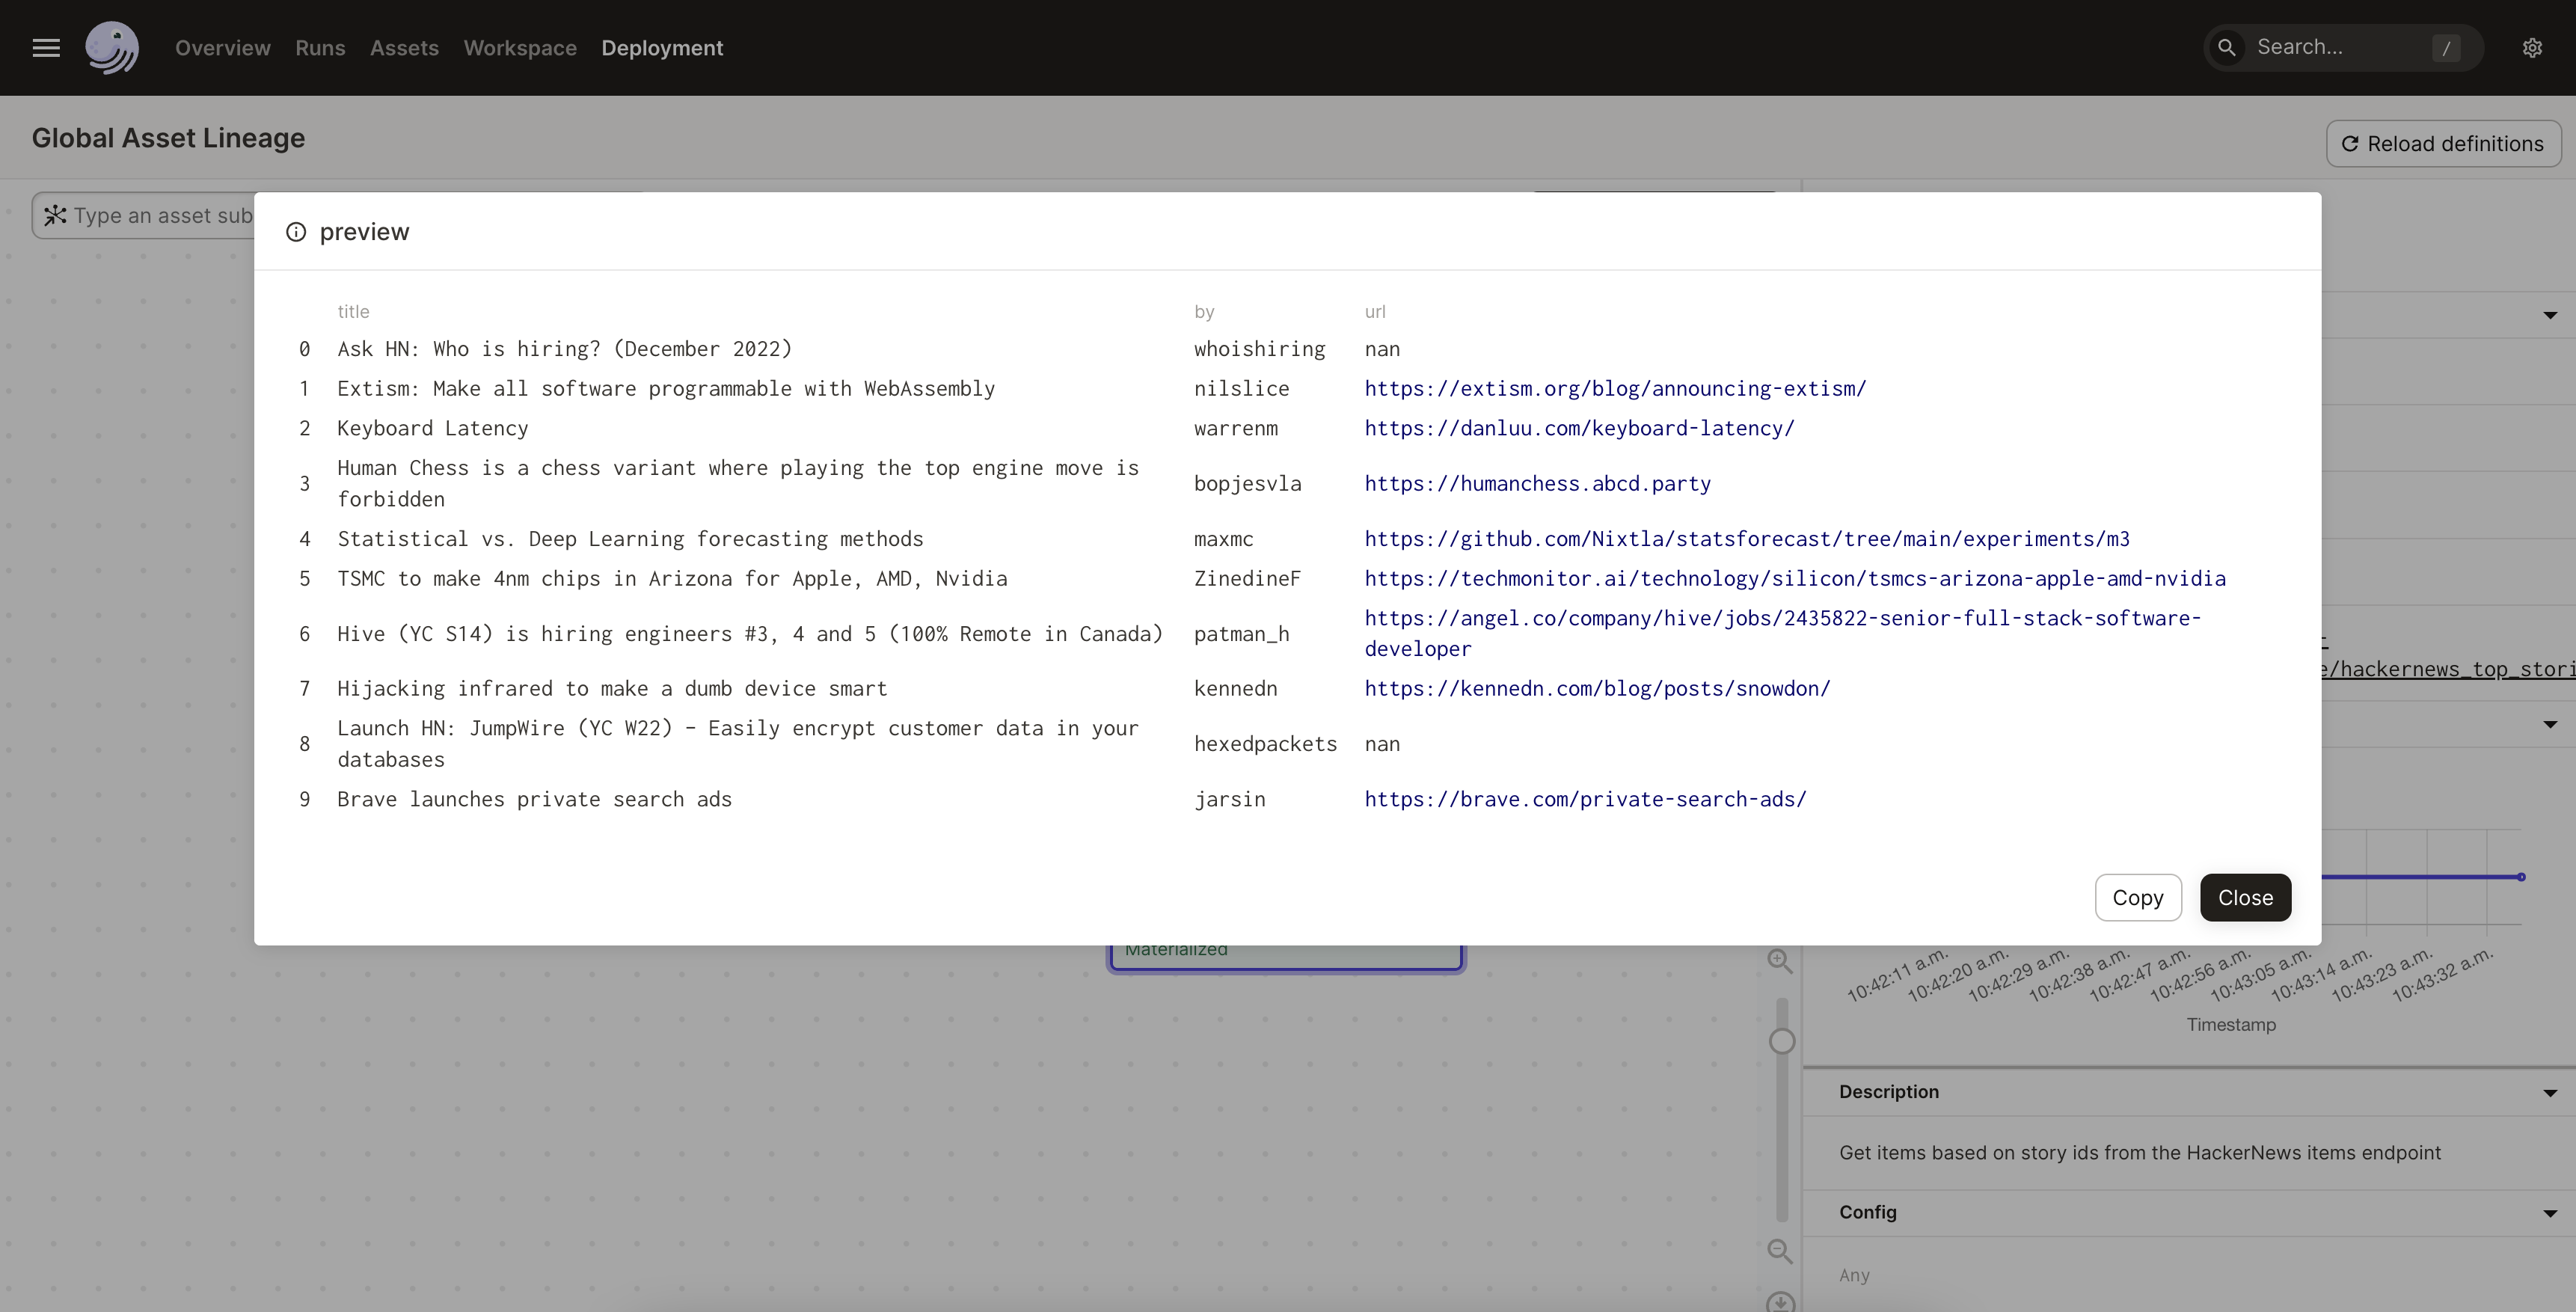
In the sidebar that displays, click the Show Markdown link in the Materialization in Last Run section. This opens a preview of the pipeline result, allowing you to view the top 10 HackerNews stories:

Next steps#
Congrats on your first Dagster pipeline! This example used assets, which most Dagster projects utilize because they let data engineers:
- Think in the same terms as stakeholders
- Answer questions about data quality and lineage
- Work with the modern data stack (dbt, Airbyte/Fivetran, Spark)
- Create declarative freshness policies instead of task-driven cron schedules
Dagster also offers ops and jobs, but we recommend starting with assets.
While this example used a single file, most Dagster projects are organized as Python packages. From here, you can:
- Start with a scaffolded blank project. Check out the new project guide for more info.
- Start with an official example, such as the dbt + Dagster project. Check out all the examples in GitHub.